Setup
INSTALLING IN A RACK
1. Attach the rack ears to the front sides of the matrix using the provided screws.
2. Install into rack and connect cabling according to mode of operation – as described below.
WARNING: To prevent damage, it is important to ensure adequate ventilation space on the sides of the matrix, especially on the ventilation openings on the side of the product enclosure.
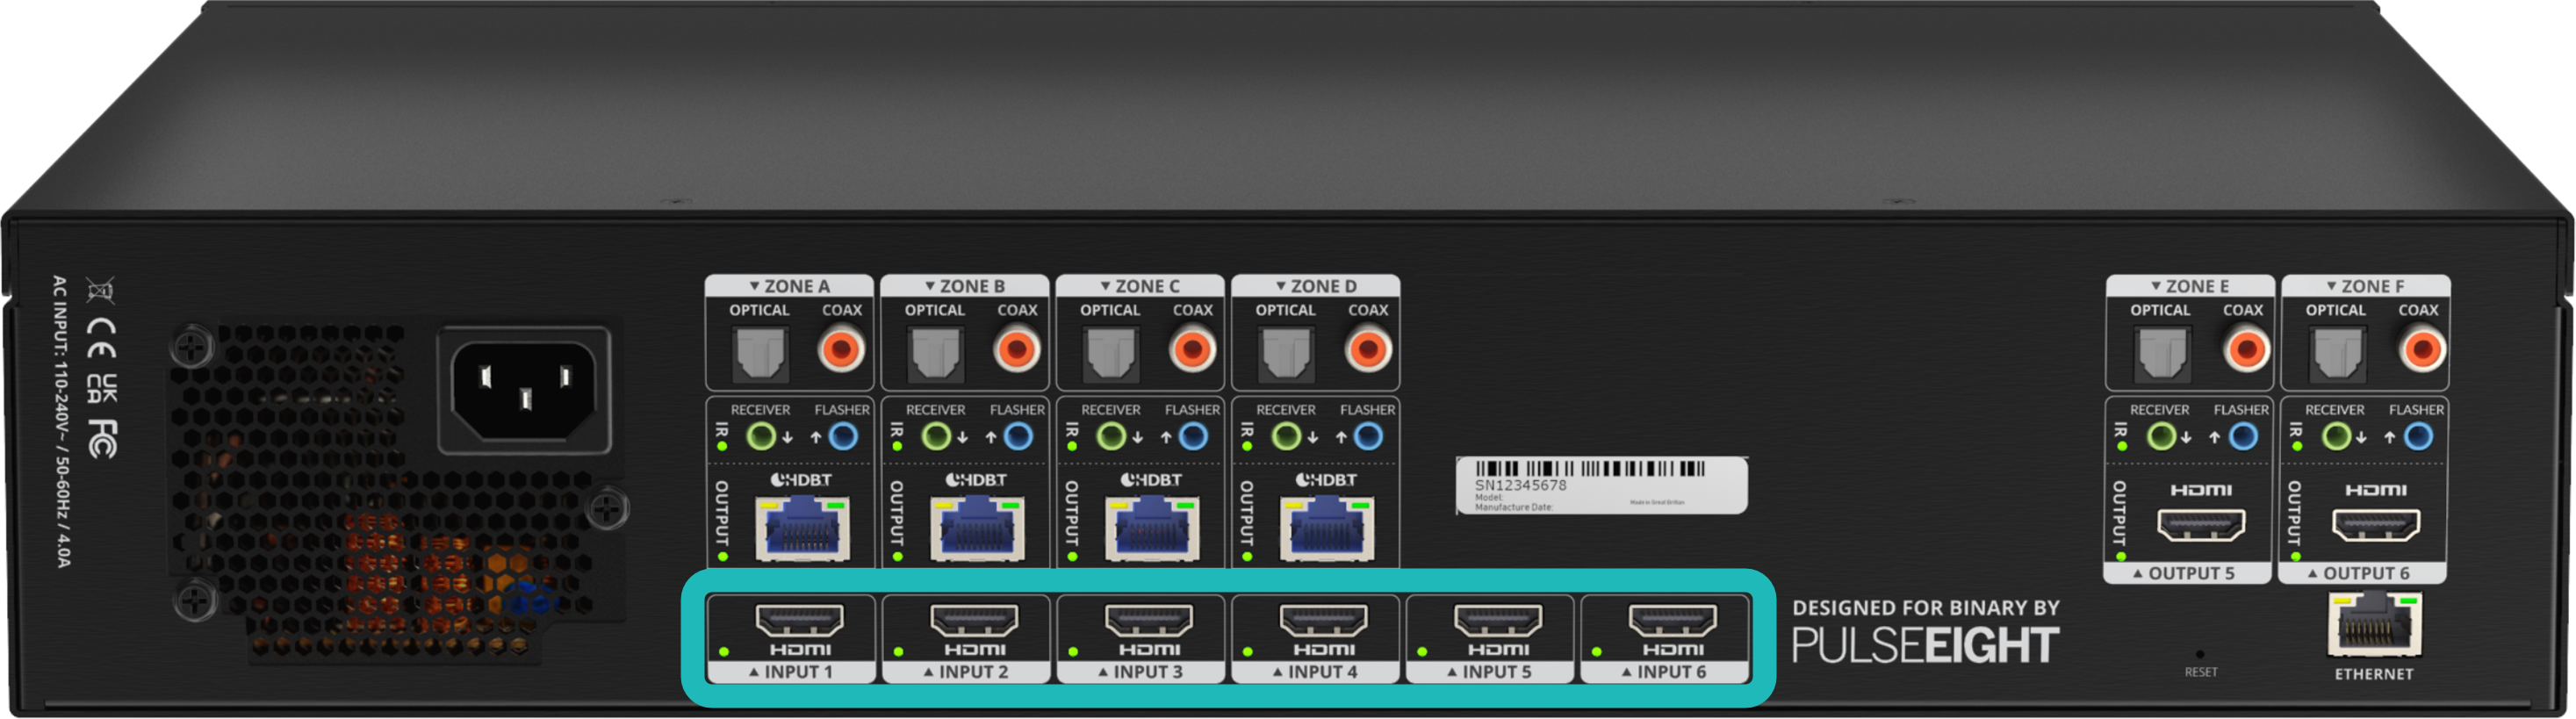
CONNECTING THE VIDEO INPUTS
3. Connect HDMI cables from your video sources (e.g. Blu-Ray player) to the HDMI inputs of the matrix.
Note: It is recommended, for ease of setup, to connect devices from Input 1 to Input 8 first.
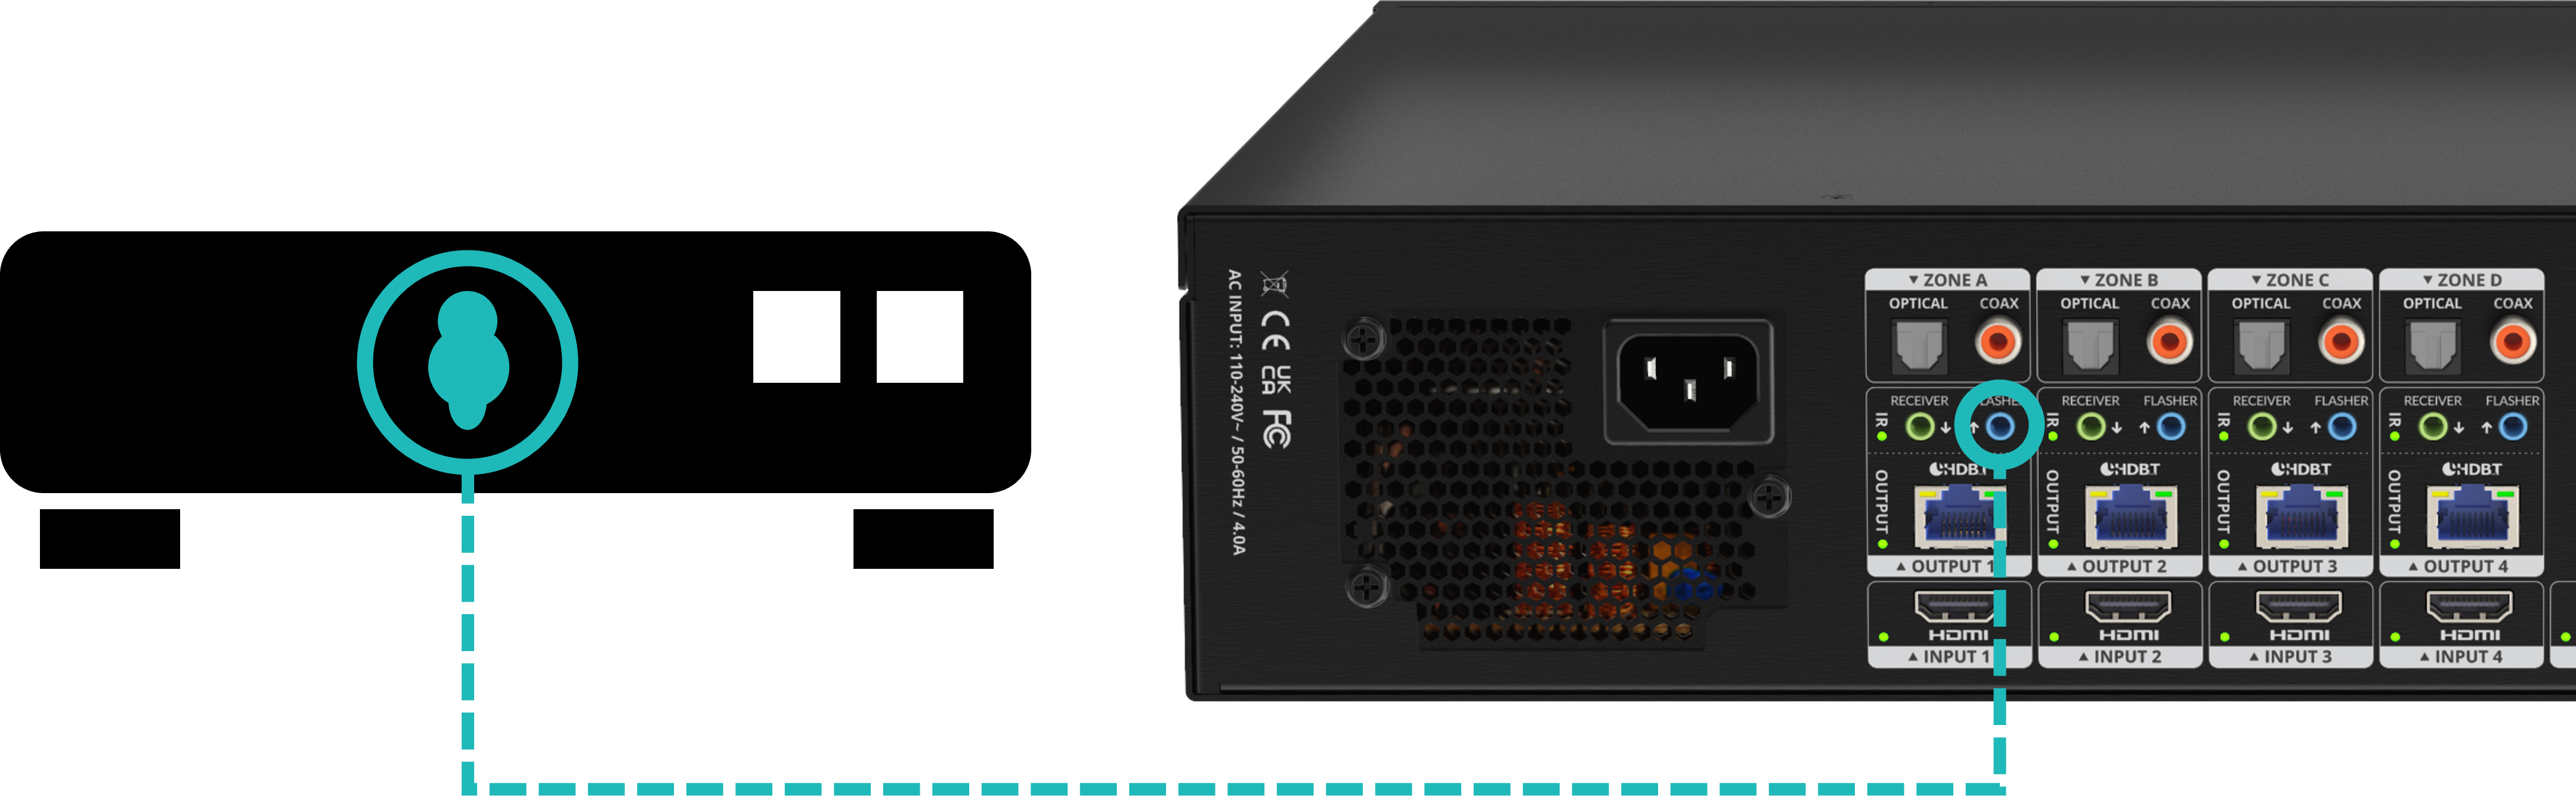
4. Connect the compatible IR Flasher (Emitter/Transmitter) over the source device's IR window and attach to the ‘Flasher' port.
Note: Ensure that the IR Emitter is connected to the same zone as the source device's HDMI input (i.e HDMI input 3 and IR 3)
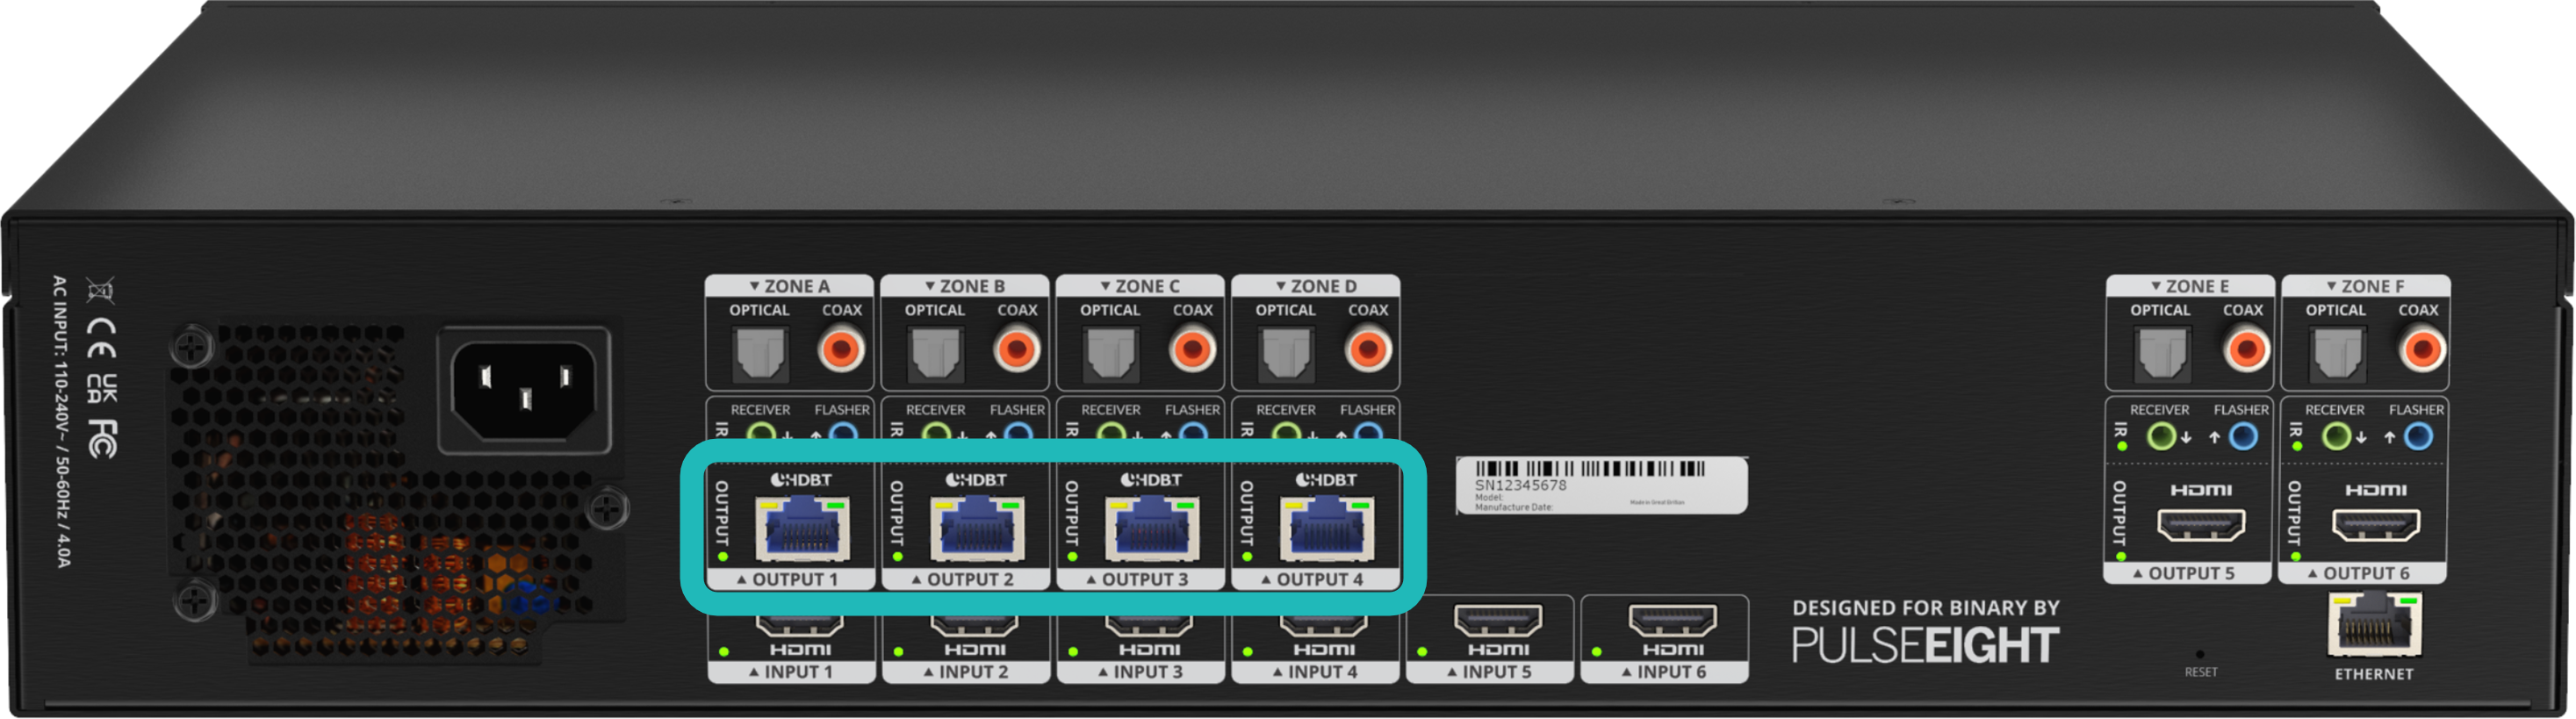
CONNECTING THE HDBaseT VIDEO OUTPUT
5. Connect the appropriate Cat5e or higher grade cable to each HDBaseT output port you require.
Note: It is recommended, for ease of setup, to connect devices from Output 1 to Output 8, although this is not necessary.
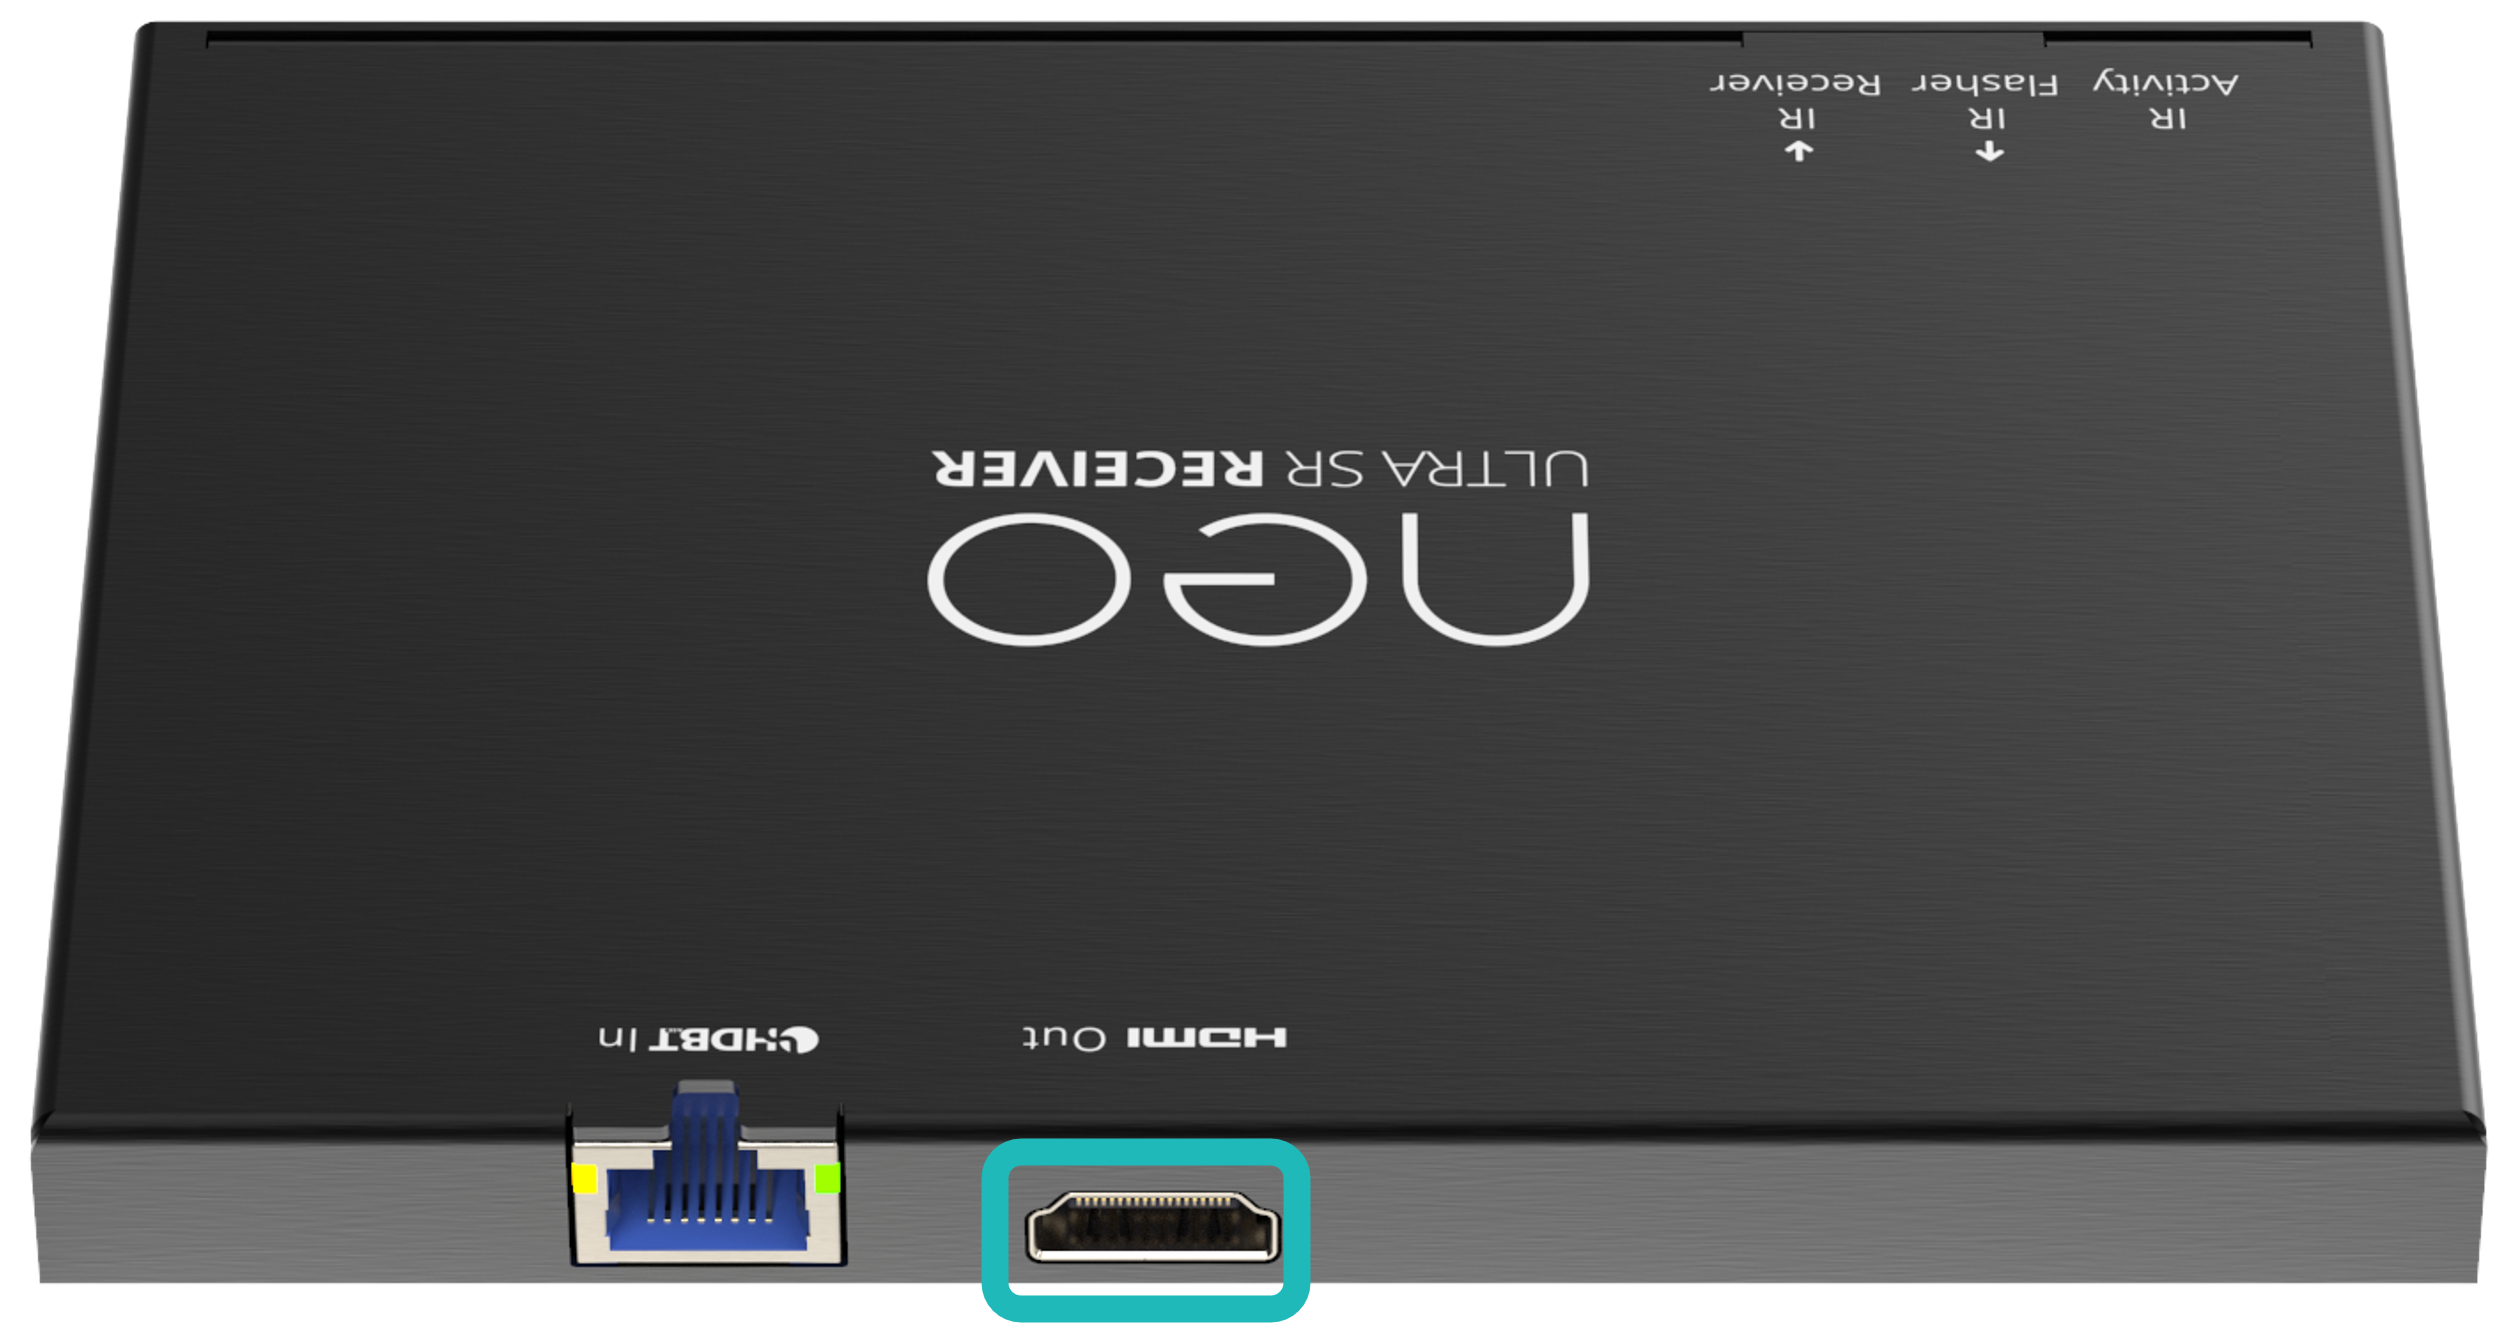
6. Complete the connection by attaching the other end of the Cat cable to a supplied neo Receiver's 'HDBaseT In' port. The receiver should be situated at the output end (i.e. TV).
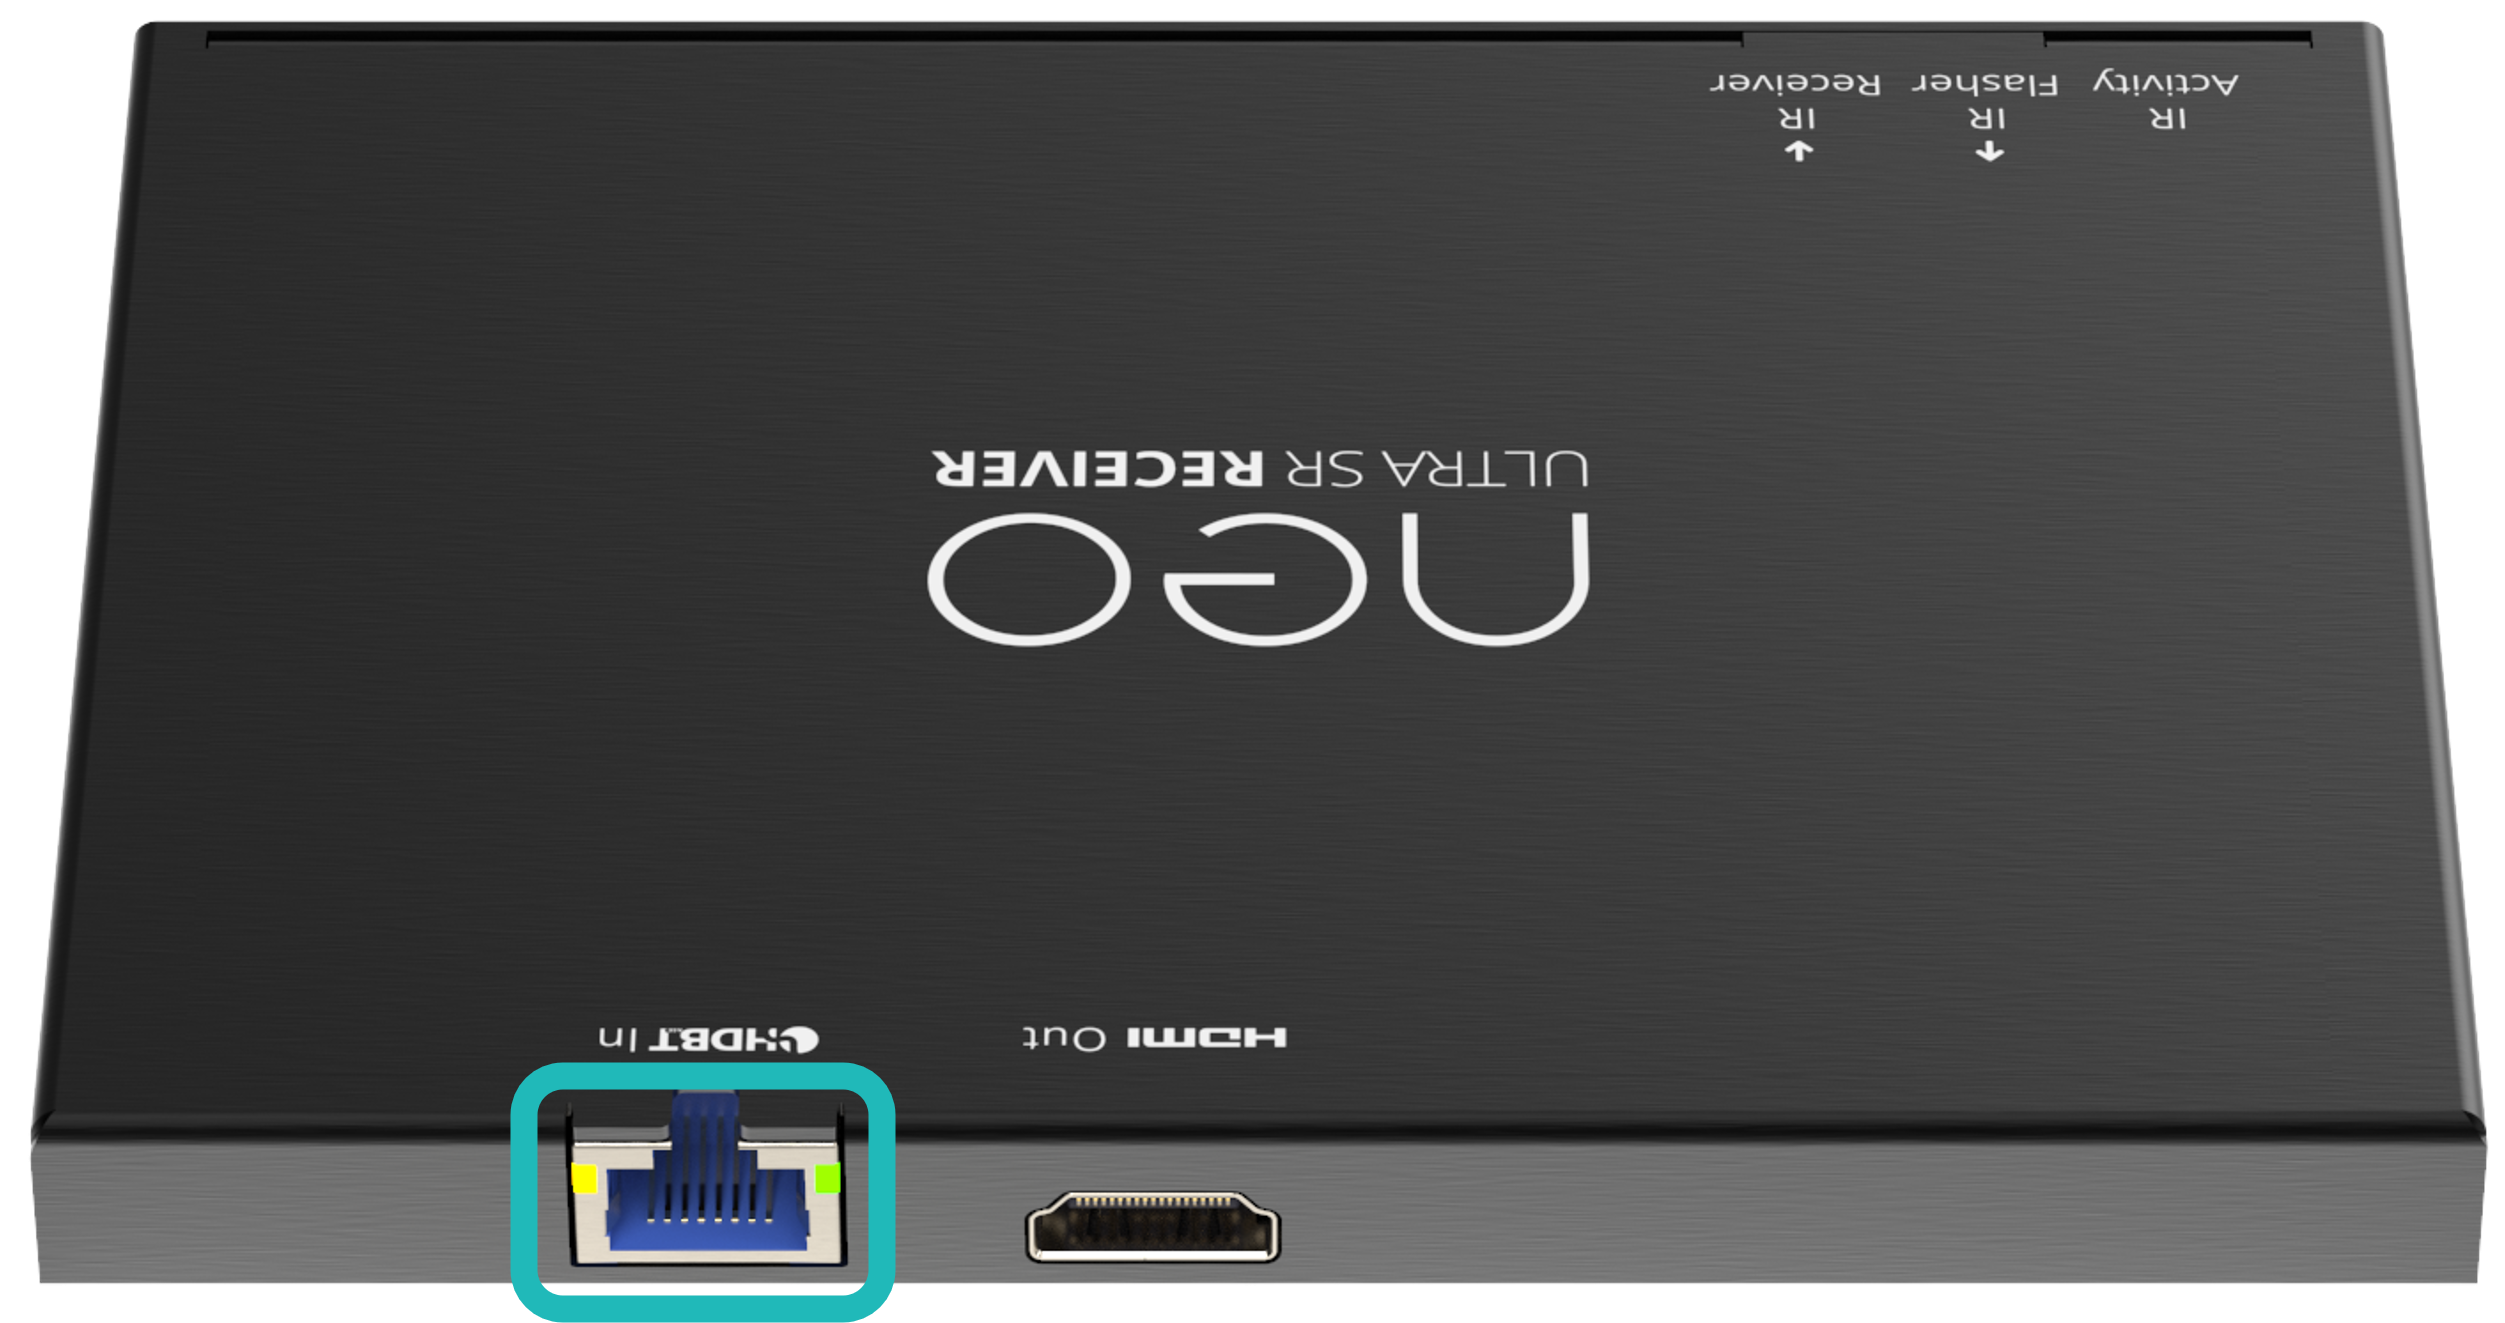
7. Connect HDMI Out to the output screen (i.e. TV).
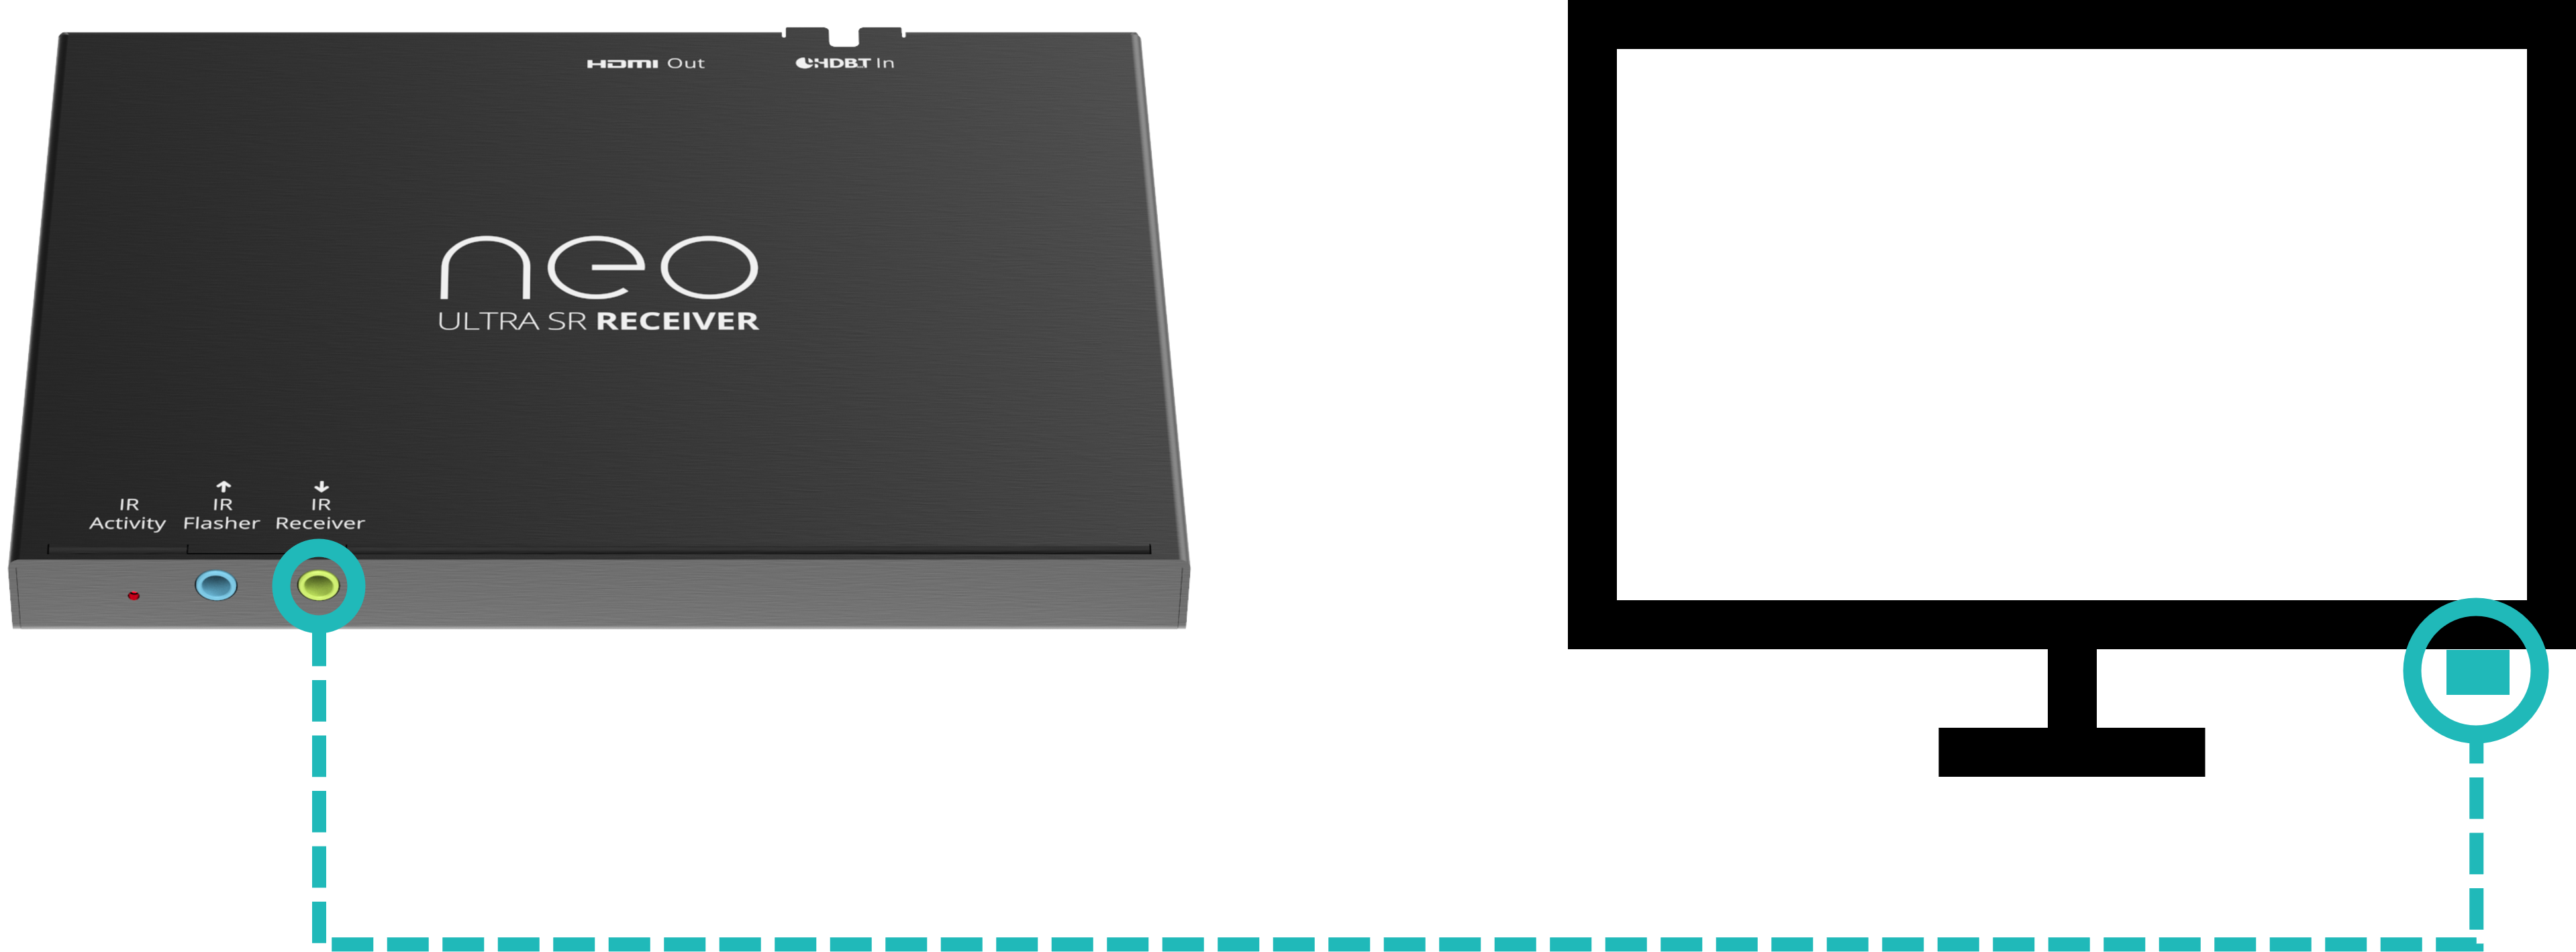
8. Attach the compatible IR receiver into the IR Receiver port and attach the bud to the underside of the sink device with the smallest end forward, as per the diagram.
Note: Use only neo:Ultra Receiver (P8-HDBT2-U-RX-S) or neo:UltraSR Receiver (P8-HDBT2-L-RX-S) as they provide the same compatible 12 V IR receiver or transmitter to the video matrix.
Note: Please make sure to use a compatible 12 V IR receiver or transmitter on this product. Please refer to IR FLASHER & RECEIVER under Cabling and Compatible Devices under Product Description.
CONNECTING THE HDMI VIDEO OUTPUTS
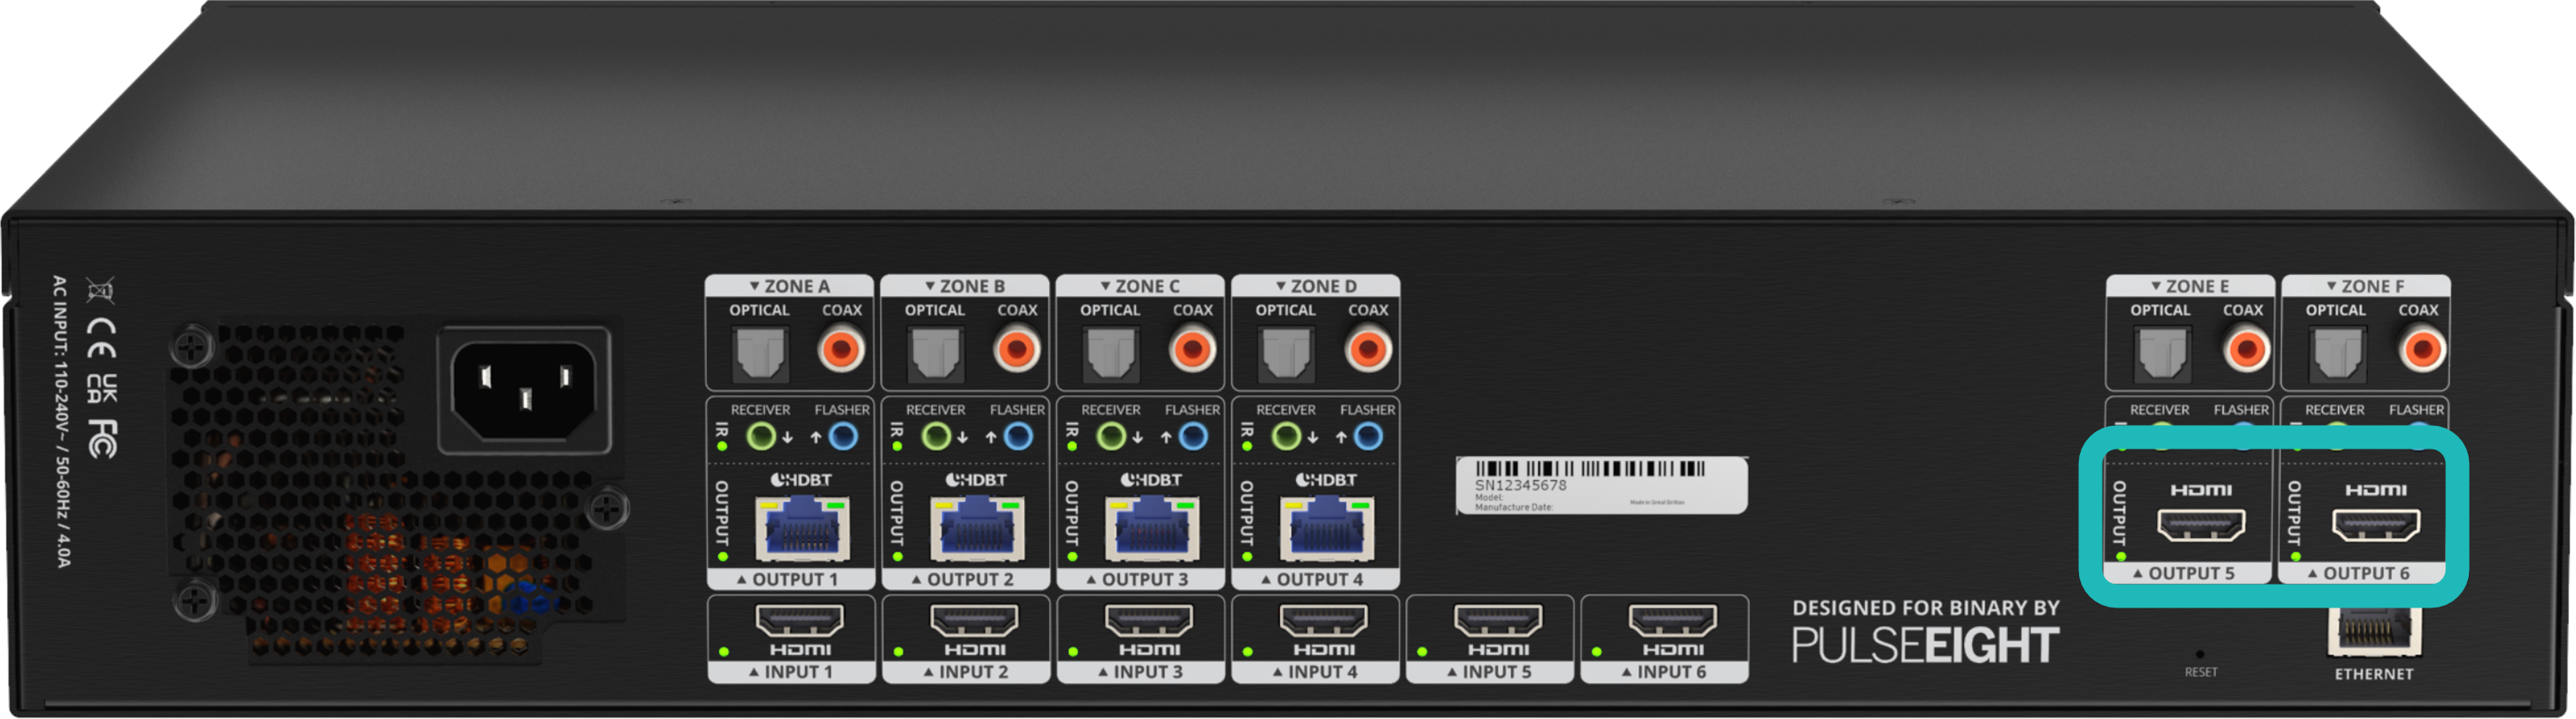
9. For Output ports 9 and 10, connect sink devices directly via high speed HDMI cables.
Note: Can also be used in conjunction with a neo HDMI Extender Set (sold separately) for reaching further distances.
CONNECTING THE AUDIO OUTPUTS
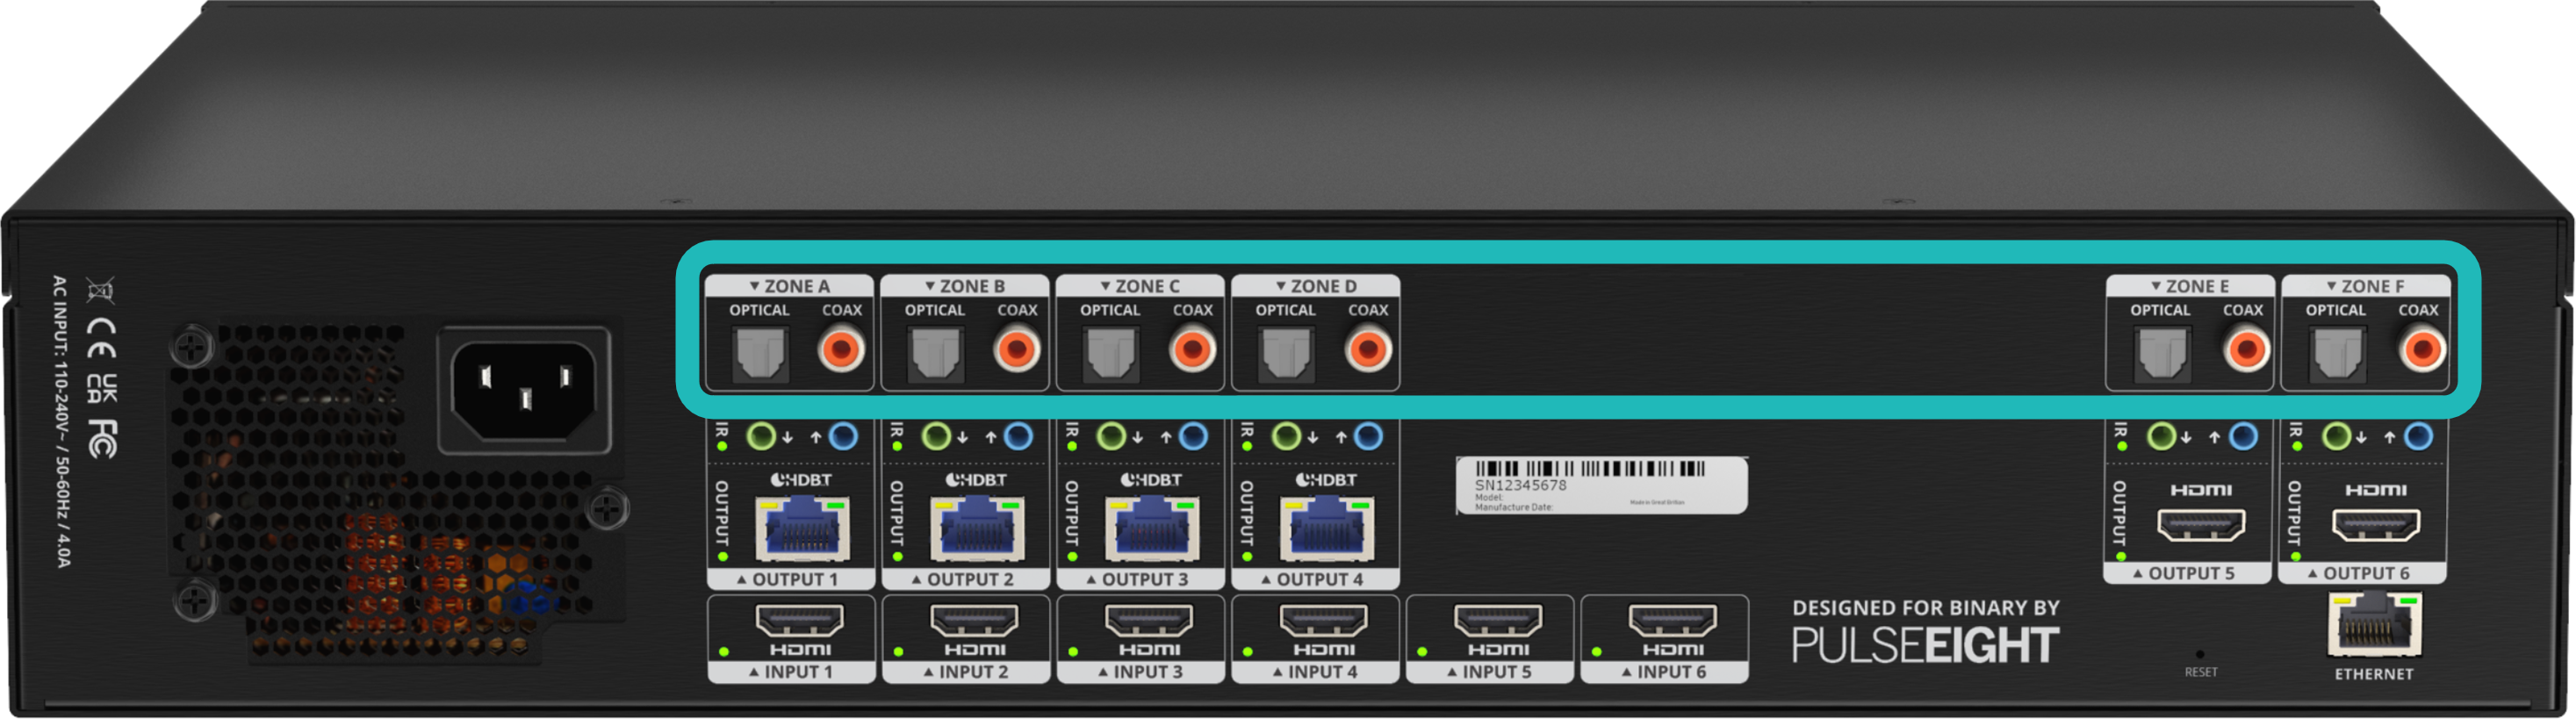
10. If you wish to use the Audio outputs, please connect optical or digital coax cables to the relevant output.
Note: There is no matrixing for the audio breakouts, they are matched to the HDMI zone - for example, the audio from HDMI input 3 will link directly to Audio Output 3
CONNECTING TO NETWORK
11. Connect a standard Ethernet cable (Category 5e/6/7) from the matrix's 'Ethernet' port to your router or network switch. Crossover cables are not supported.
Note: Network connection is required for supporting full control/remote monitoring features of the product.
TURNING ON THE MATRIX
12. Insert the supplied power cord and plug into the AC mains.
13. Turn ON the power switch.
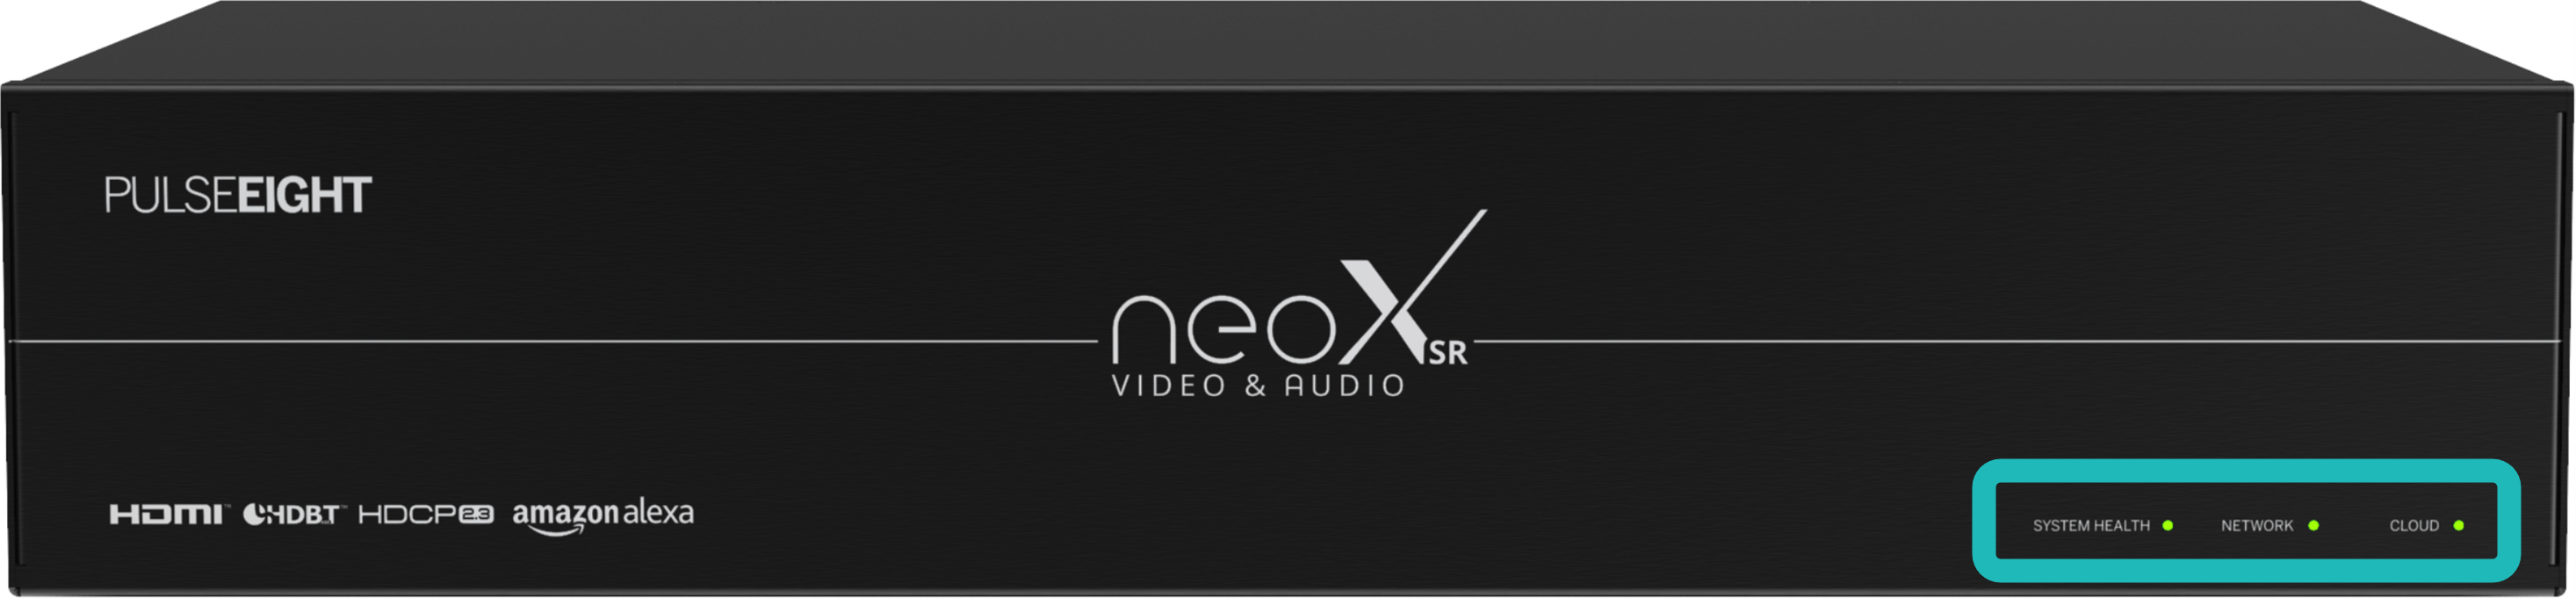
14. As it powers ON, the front panel LEDs (System Health, Network, Cloud) will illuminate momentarily before it begins its initialisation sequence.
Note: The initialisation process takes between 20 seconds and up to 2 minutes. However, it is possible that a firmware update may be available the first time the unit is powered ON - in this instance the matrix may take longer to initialize. If both the System Health and Network LEDs flash (orange/green) quickly together then a firmware update is being applied. Please wait and do not disconnect the power until this update has completed.
15. Once initialisation has been completed, the System Health, Network and Cloud LEDs should all appear ON (green).
16. You are now ready to setup the matrix using the web interface. Please follow the steps in the 'Connecting to Admin Web Interface' section.
17. Using a computer connected to same router/network, access and login to the Web Interface by visiting www.gotomymatrix.com in your web browser.
18. Activate administrative rights by clicking on the  Cloud Connection tab on the left hand nav, then click on the '[Admin]' link at the foot of the page.

19. Whilst on the Cloud Connection page, insert your Installer ID into the box and save changes - this will enable the matrix to be linked to your monitoring account. If you have not set up an installer ID, please contact Snap One support to obtain the password. Alternatively, please refer to the 'Quick Star Guide' for further instructions.
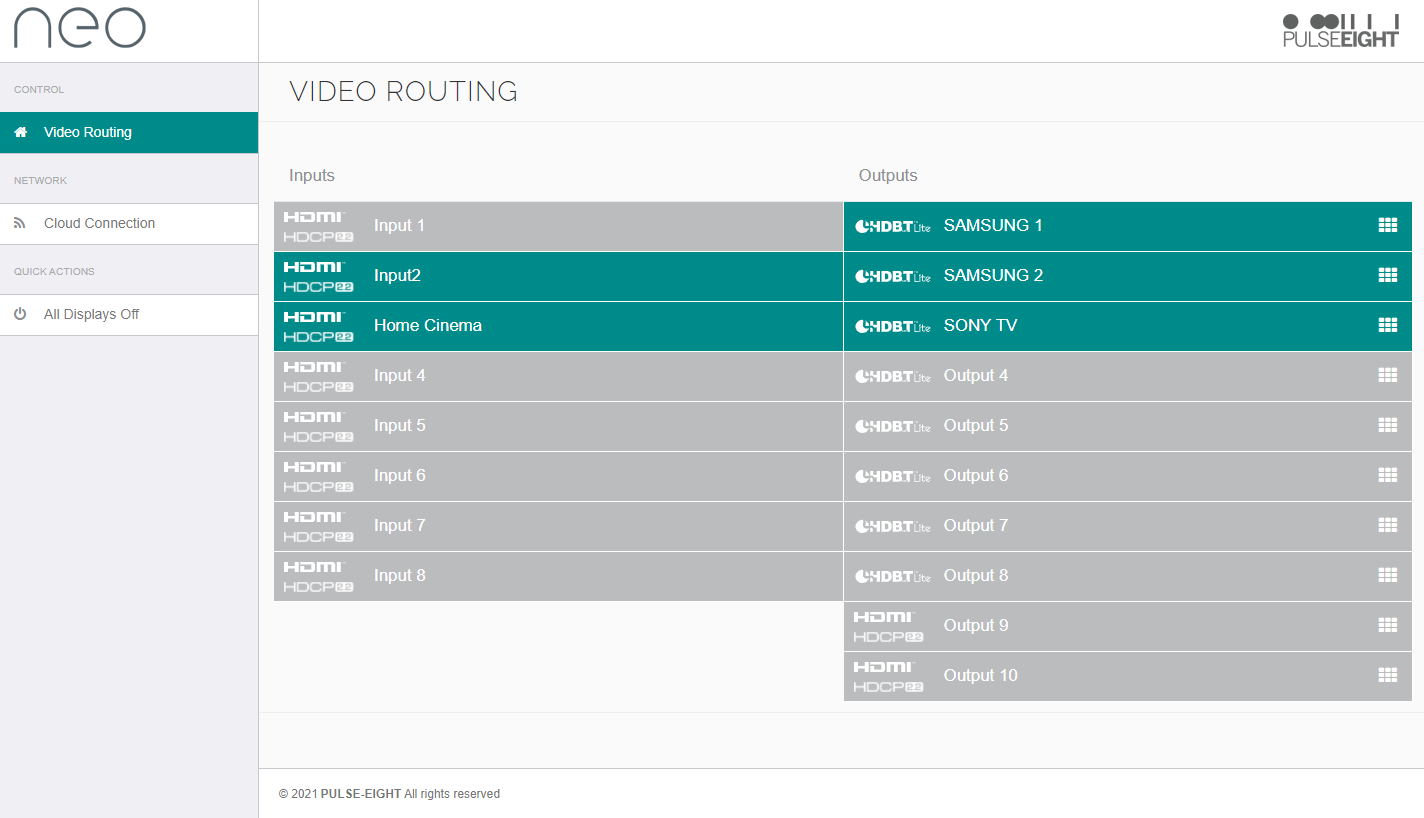
20. Within this interface are many setup options - please refer to the Web Interface Setup Guide for further details.